How to rip assets from Shockwave games
Click here for the newer version.
Disclaimer: This page mostly reproduces info already available in the Shockwave discord, the OneKnowledge discord, this series of tweets by Greg Kennedy, and this tutorial by nosamu. I do not intend to take any credit, but merely to reproduce and expand upon the already existing knowledge in a way that makes it easier to find by Google (so the next person doesn't have to spend many hours scouring Discord servers for hints and clues, like I did). All credits go to the previously cited persons and communities.
If you encounter any mistakes in this post, or if a more accurate tutorial appears, feel free to message me and I'll make the necessary changes. If this tutorial doesn't work for you, I suggest asking for help at one of the previously cited Discord servers.
Update 22-09-06: This method has been reported not to work with Shockwave games from much older versions, like from 1995 (thanks Briele!). If it doesn't work for you as well, then at least know that you are not alone.
Introduction
So, you want to rip assets from an old Shockwave game. You already have a copy of the game's folders and files, but there are no assets to be found - or at least, not the ones you want. Fear not, for there is a way.
Shockwave games were made using a program called Macromedia Director. Director can open .DIR files, which work like the scenes of your average game engine, and .CST files, which are collections of assets. If your game is composed of files of this type, then the rest is easy - you just have to open the .DIR files in Director and extract those sweet, sweet assets (we'll see a tool that helps you with that). However, it's far more likely that your game contains .DXR and .CXT files which are "protected" and can't be easily opened, or perhaps a single .DCR file which is "compressed" and provides similar difficulties. Thankfully, there is a tool that lets Director open these kinds of files as well.
Installation
To obtain the assets from the game, you will need to install the following items:
1. Macromedia Director
Regardless of the extension you have at hand, you will need to install Director - the version "Director MX 2004" works well. Directly from nosamu's post:
To set up Director, download the installer from here: http://download.macromedia.com/pub/director/updates/mx2004/win/dmx2004_101_update_en.exe
In newer versions of Windows, you may need to run both the installer and the program itself in Compatibility Mode for Windows XP. When you’re prompted for a license key, type the following: DRD100-50836-87264-59396
If installation doesn't work, you can try installing it inside a Windows XP Virtual Machine (I didn't find it necessary, running in compatibility mode was enough for me). Afterwards, launching Director can be done by opening "C:\Program Files (x86)\Macromedia\Director MX 2004\Director.exe".
2. nosamu's CastRipperTool
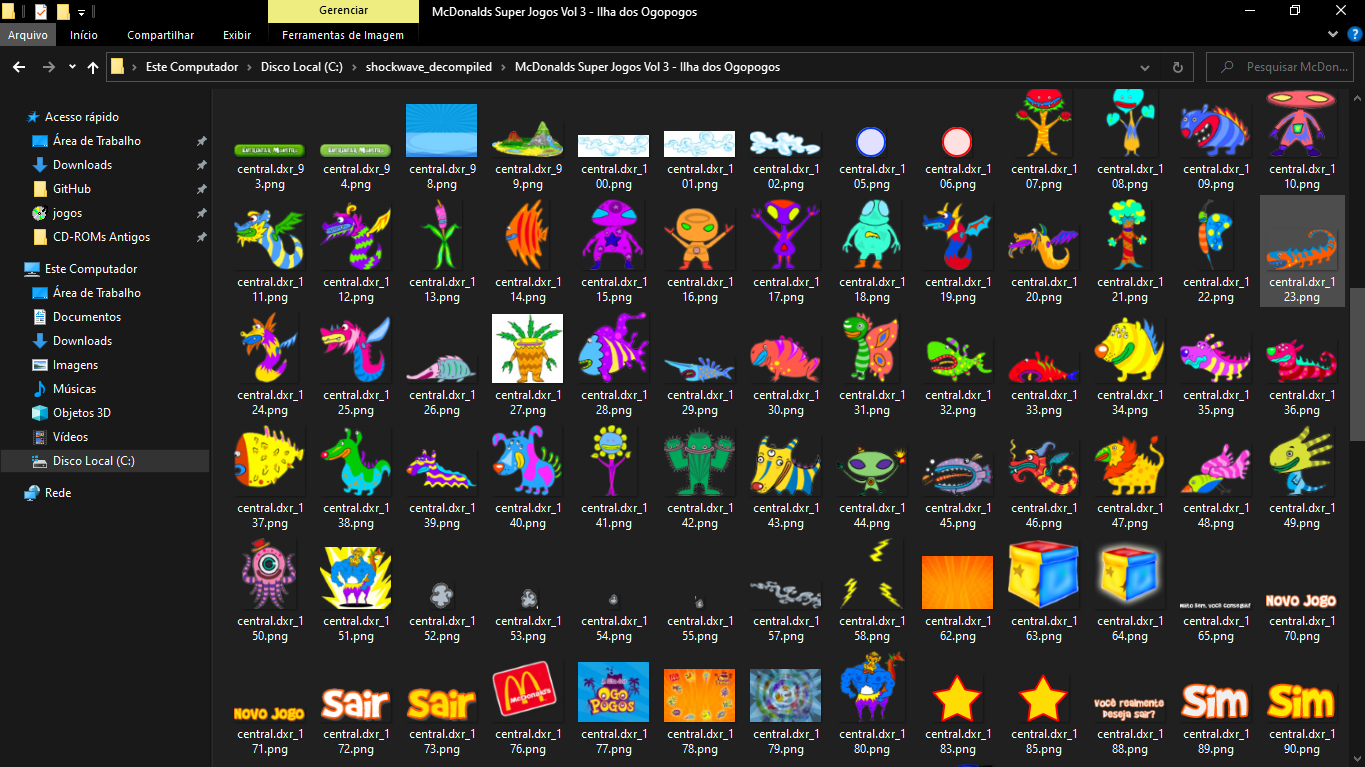
Also regardless of the extension you have at hand, you will need to install nosamu's CastRipperTool. It is called "Cast Ripper" because In Macromedia Director's terms, an asset is called a "cast member" and a collection of assets is called a "cast" (that's why asset files are called .CST). So "cast ripping" essentially means "asset ripping" - indeed, this tool makes it extremely easy to dump every asset from the game into an output folder, basically doing the hard work of ripping the game for you.
You can download the tool here (I've mirrored it here). To install it, just put it into the Configuration/Xtras folder in your Director path (for me, the path is "C:\Program Files (x86)\Macromedia\Director MX 2004\Configuration\Xtras").
To continue the installation, launch Director and go to the Xtras menu in the toolbar. Click "CastRipperTool", and the following screen will appear:
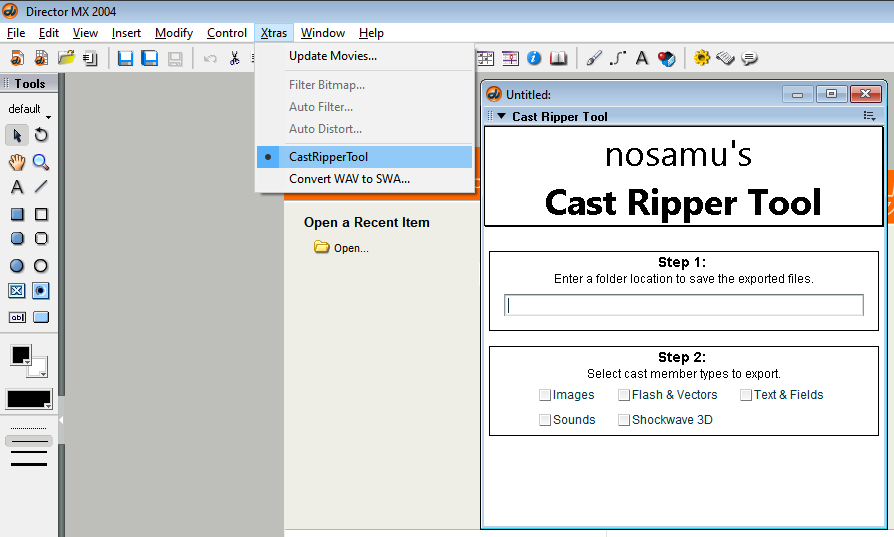
Now, click on the "cast member type" boxes (Images, Sounds, Flash & Vectors, etc...). Since this is your first time launching CastRipperTool, it is likely going to ask for you to download some dependencies for you to extract some types of assets. The tool will redirect you to the websites where you can find these dependencies; you will need to go to these websites, download the .x32 files, and put them into your "Configuration\Xtras" folder. In my case, only Sounds and Flash & Vectors needed dependencies - respectively, the "mp3.x32" and "swfExport.x32" extras. I have mirrored them here and here.
After installing these dependencies, nosamu's CastRipperTool is successfully installed.
(I have not managed to extract Shockwave 3D cast members, perhaps because the games I have tried to rip do not include assets of this kind.)
3. tomysshadow's Movie Restorer Xtra
If you have a .DXR or .DCR file, then you will also need tomysshadow's Movie Restorer Xtra. This is an Xtra (i.e. package/dependency/library) for Macromedia Director that allows it to open protected (.DXR) and compressed (.DCR) files.
To download this tool, just access the GitHub repository here and click "Code ⇒ Download ZIP". The relevant file is the "Movie Restorer.x32" Xtra in the "Movie-Restorer-Xtra/winproj/Release/" folder. To install it, just put it into your "Configuration/Xtras" folder. I have mirrored this Xtra here.
Extracting assets
Now, if you have successfully installed the necessary programs, then it's safe to say that the hard part is over. The extraction itself is very easy:
- Launch Director.
- In the toolbar, go to "Xtras/Movie Restorer Tool 1.4.5" and click "Enable". (If you have .DIR files, just skip this step.)
- In the toolbar, go to "File" and click "Open...".
- In "Type", select "All files" - otherwise your files won't be visible.
- Select one of the .DCR, .DXR or .DIR files that you want to extract.
- In the toolbar, go to "Xtras" and click "CastRipperTool".
- Follow the steps in "CastRipperTool".
- In step 1, enter a folder to save the exported files.
- In step 2, check the boxes for the asset types that you want to extract.
- Click "Go!"
- (Tip: I haven't been able to paste text into the output path box, so I have to type the output path by hand... If this is the case for you, I suggest creating a shorter path like "C:/shockwave_decompiled/" to make things easier. Also, if I type something in the output path box and erase it completely using backspace, Director crashes. If this is also the case for you, you're not the only one).
- You're done! If you want to rip another file, just keep Director open and continue from Step 3.
Bonus: extracting assets from .EXE files
Directly from Greg Kennedy's tweets:
Sometimes the Projector .EXE file contains embedded .DIR / .CST files with more stuff inside. To get those, you can use this Python script to dump them. Then you can use this process to retrieve the resources inside.
The script is fairly straightforward to launch, but it requires using a Terminal and running a Python script. Explaining it briefly: you have to install Python's latest version, open a terminal (press Windows+R and type "cmd.exe"), and then run the python shock.py application.exe command (replacing "application.exe" by the full path name of your .EXE file, between quotation marks). The embedded Director files will be created in the .EXE folder.
Conclusion
As previously said, all credits go to the original creators of the tools and the tutorials which made this possible. If you find any errors feel free to message me. If it doesn't work for you, I suggest asking for help at one of the Discord servers mentioned at the beginning of this post.
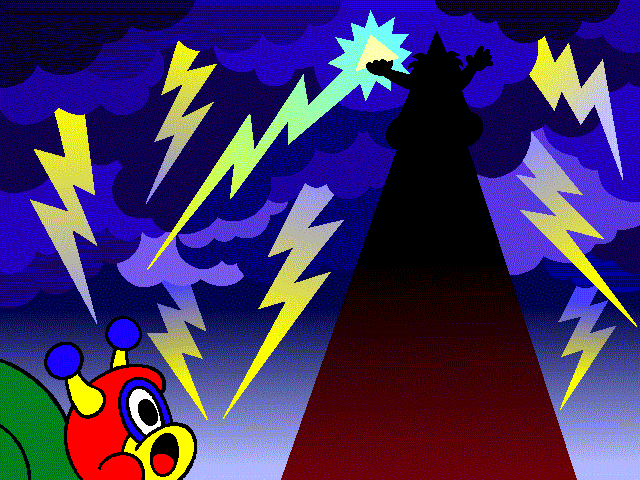
Have some ripped assets from Caracolino (1997).